Understand Zoom Controls

Muting/Unmuting
- At times you need to mute your microphone during the class, maybe when learners are going over some questions or maybe to suppress background noises. Click Mute option on the lower left-hand corner of the screen.
- The Mute icon will change into an Unmute icon. Your microphone is now turned off and no one on the call can hear you. To turn your microphone back on, click Unmute on the toolbar.
Stop Video
It is recommended that you keep your video on throughout the zoom class for better interaction with the learners, however, if your internet bandwidth is extremely low and is hampering the class, in that case you can turn it off by clicking Stop Video.
The icon will change to Start Video which you can use to start the video again.
Manage Participants
You can manage (rename or mute) your learners using this option.
- For instance, it could be possible that a lot of background noise is coming from a specific learner’s end and you need to mute that learner, simply click Participants, hover mouse over that student in the popup frame and click the Mute option.
- To mute all the participants click Mute all.
Chat
You can use the Chat option to interact with your learners. You can send a group chat message or send a private message to an individual. Zoom chat is a great way to share links, clarify something during the class or receive responses from the students..
Share Screen
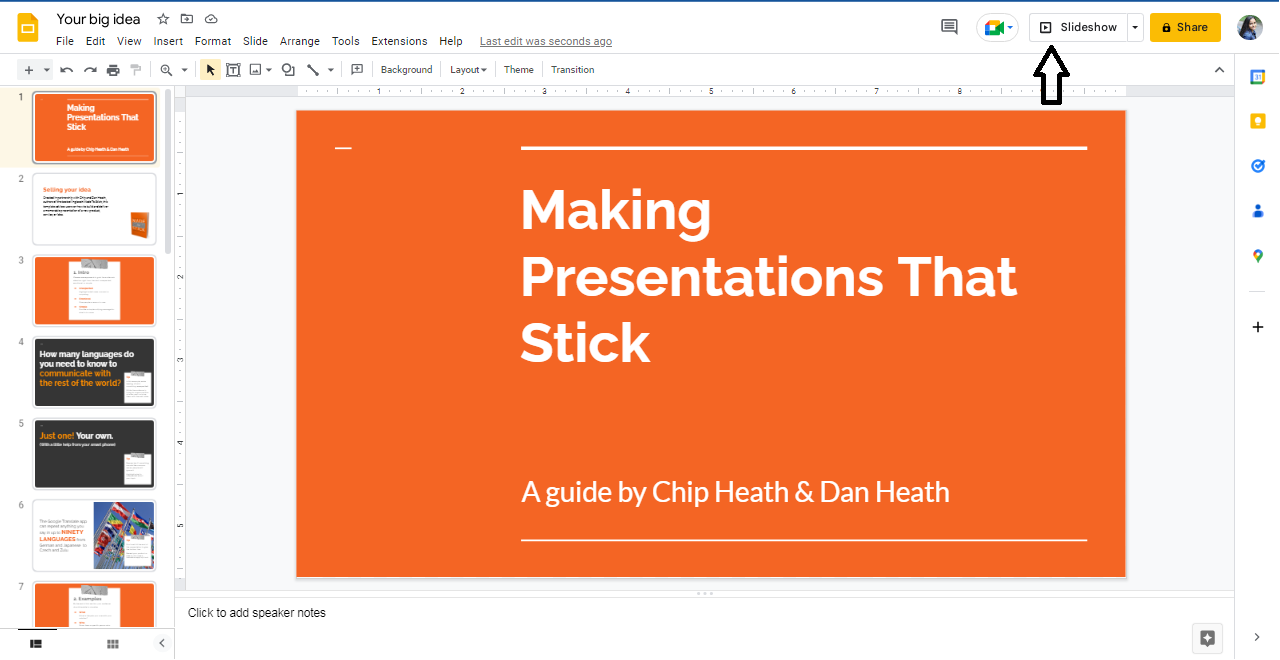
This button gives you the ability to share content with your learners. To share your presentation:
- First open the presentation and put it in Slideshow mode by clicking on the Slideshow button to make it go full screen.
- Now go back to the Zoom screen by pressing Alt+Tab and simply select the share screen option at the bottom of your meeting window.
- From here you will be given various options for sharing such as sharing your full desktop, Whiteboard to scribble on or your browser window.
- Select the browser window where you have opened your presentation.
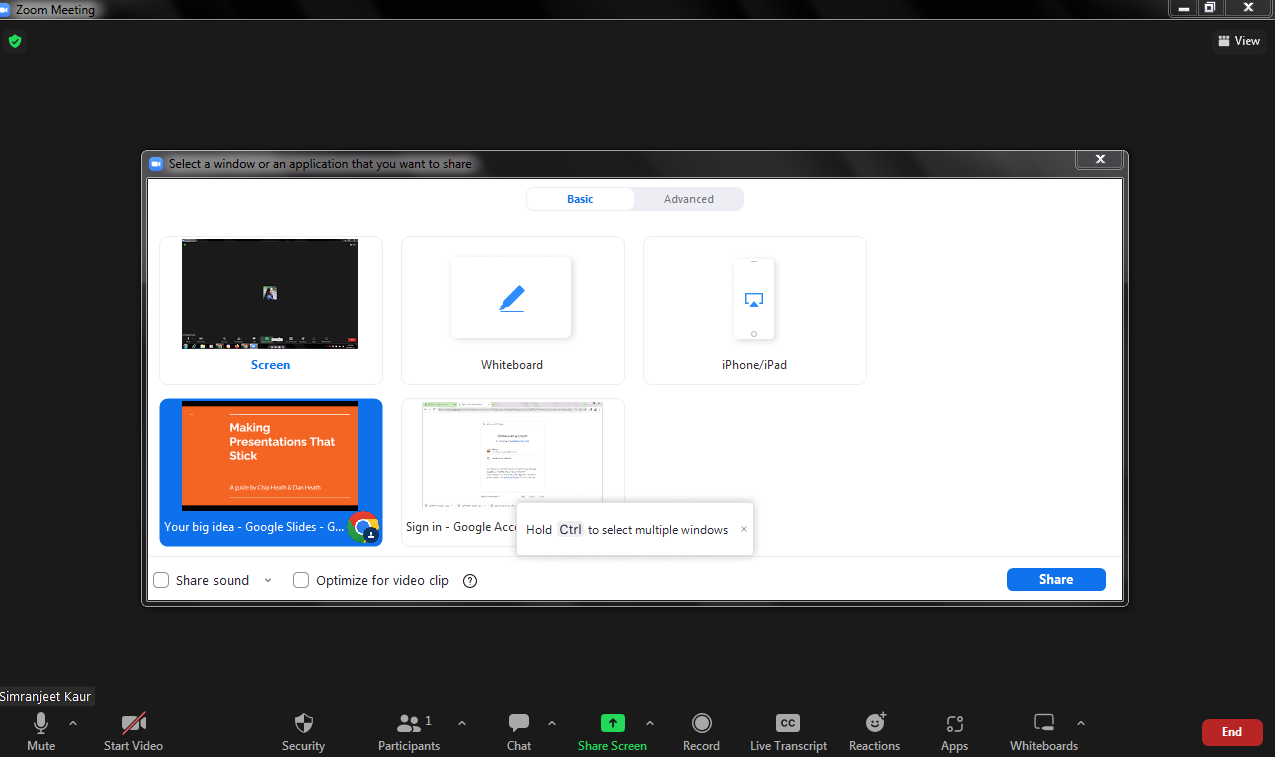
- If you want to share content that contains audio or video be sure to select Share computer sound in the bottom left-hand corner to ensure that your students can hear your computer sound as you are sharing.
- Finally, select Share on the right-hand side.
- To stop sharing the content with others, click Stop Share.
Annotations tools
After sharing your presentation, annotation controls will display.
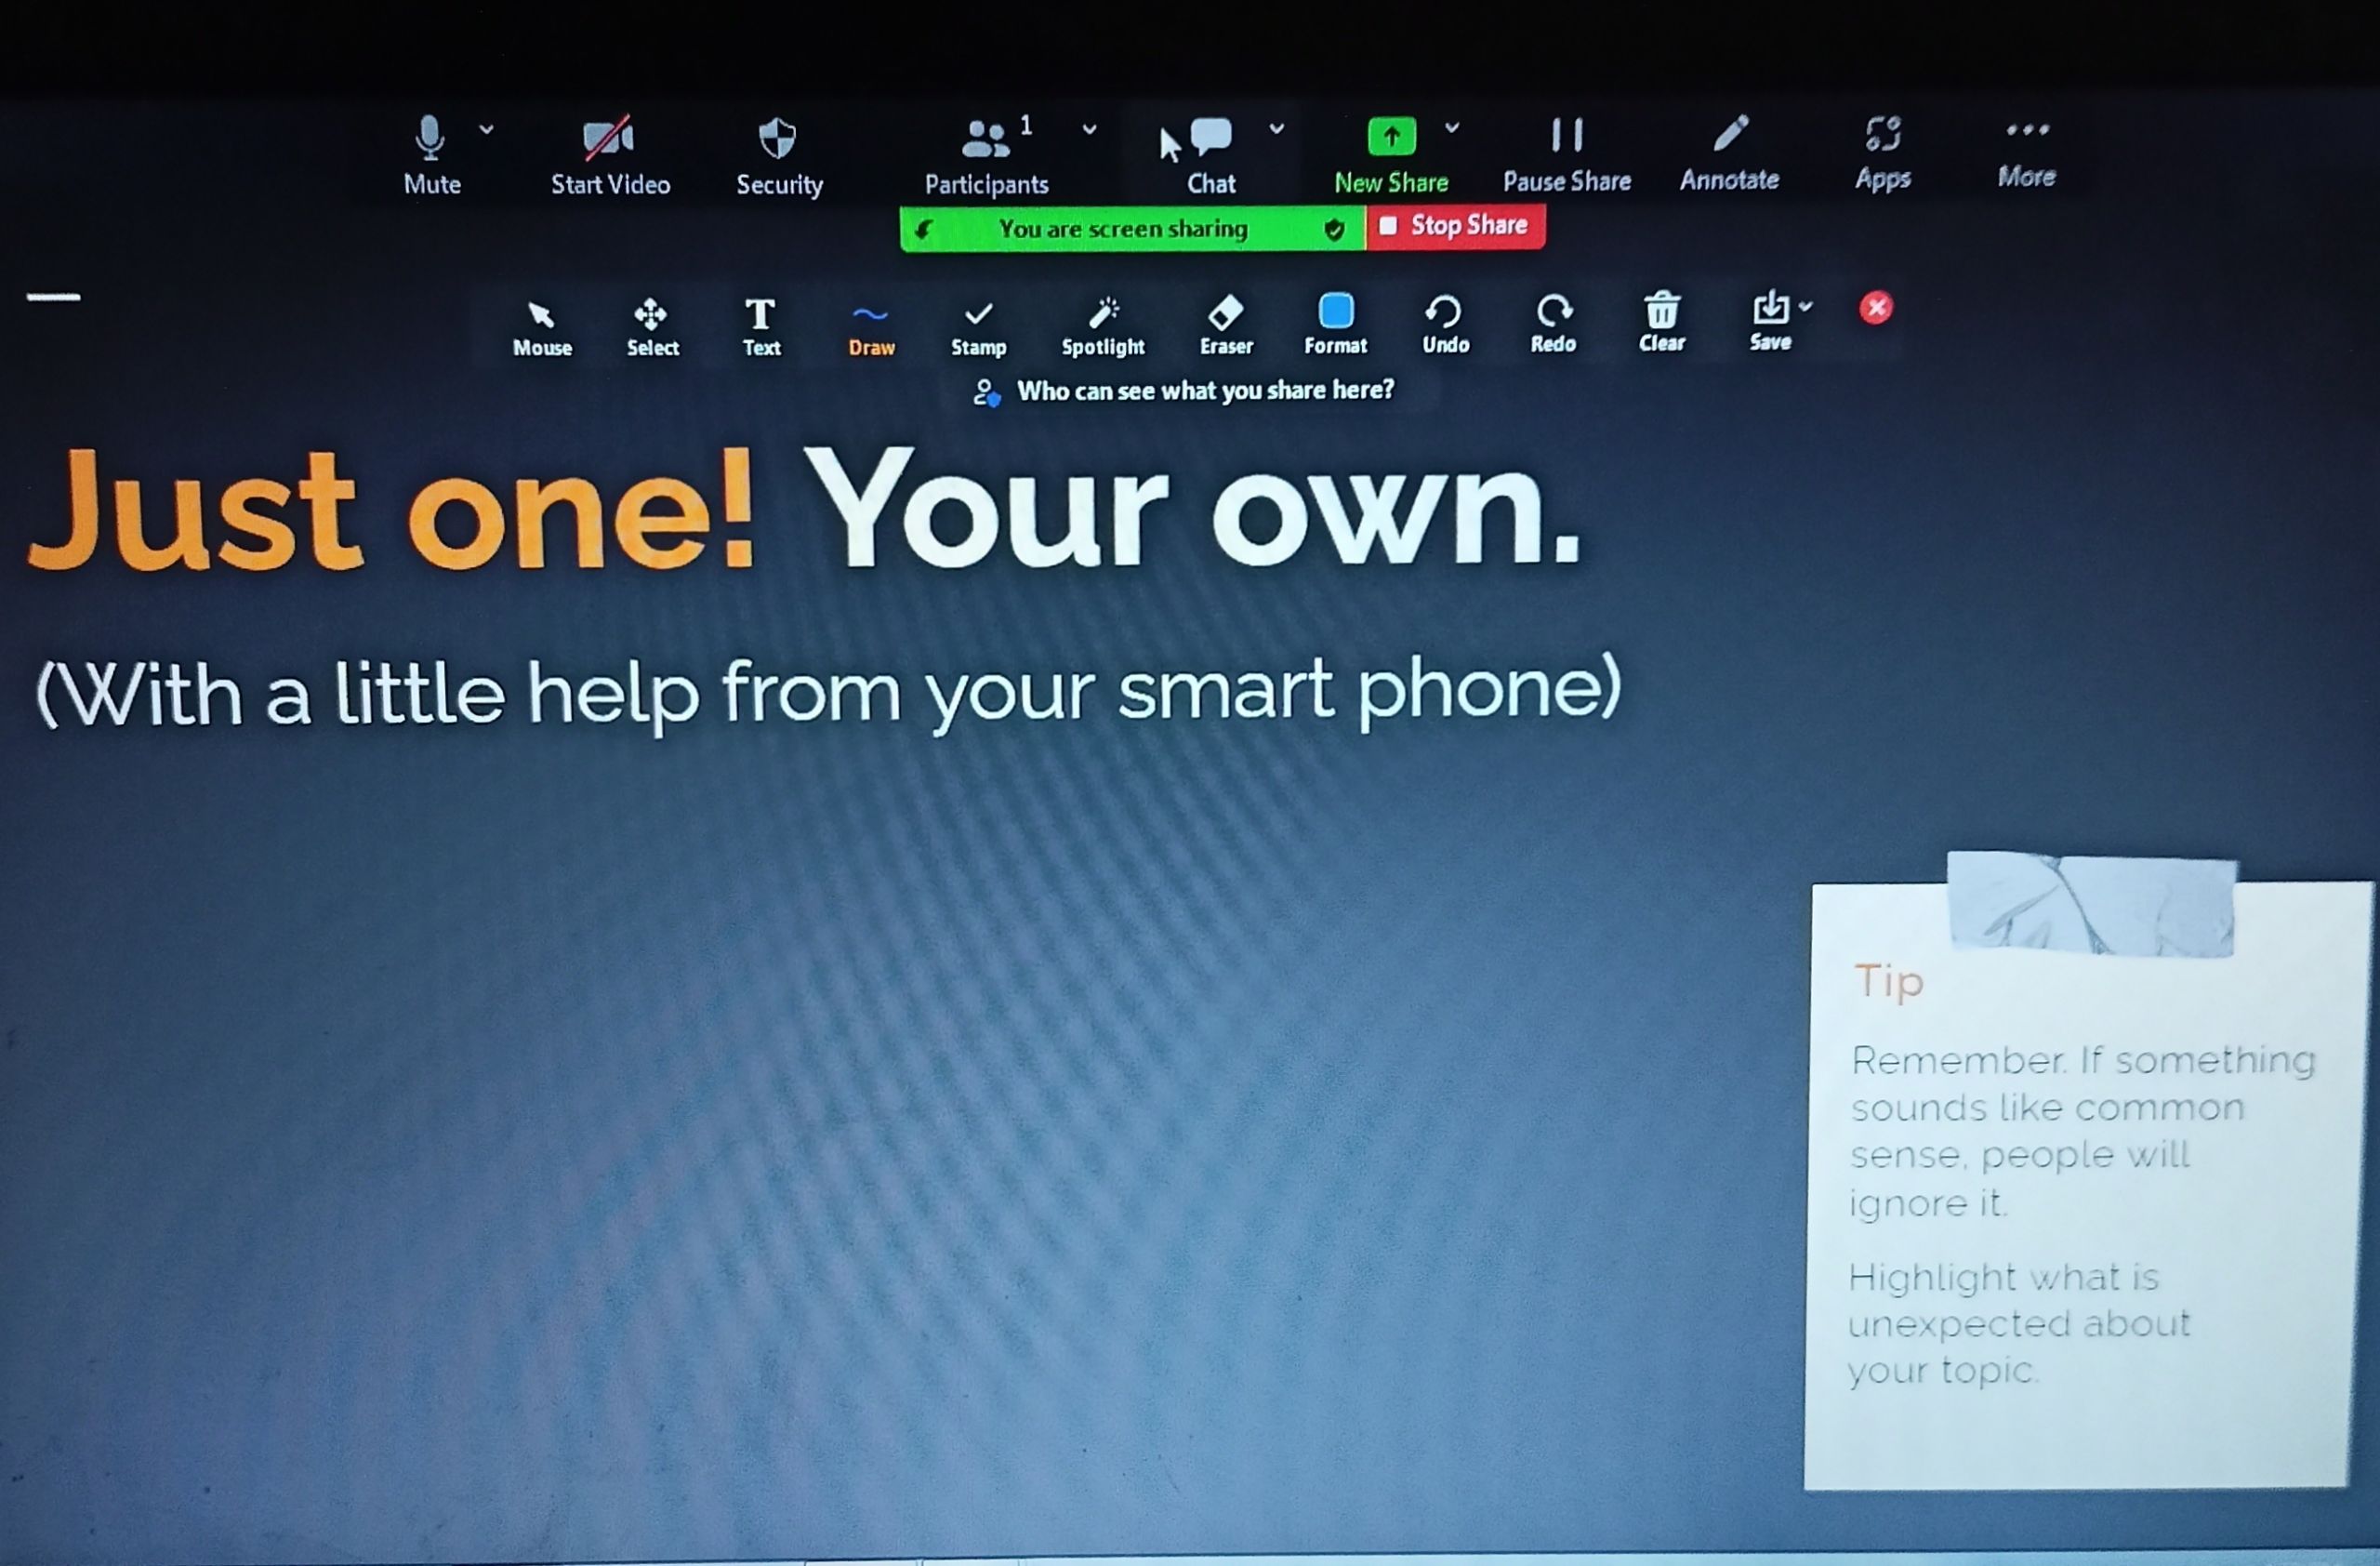
You can use these tools to draw or write on a shared screen to make your session even more engaging.
- For example, if you want to underline some text in the presentation you can go to the draw option and select the line tool.
- If you want to write something then make use of the Text tool (T).
Similarly, you have more tools such as Spotlight to highlight any section of the shared screen, or Eraser to erase any drawing or writing that you have done during the class.
Disable Annotation for Others
You learners also have the ability to annotate on the screen. If somebody in the class is scribbling on the screen unnecessarily you can take away their annotation rights.
- In the Screen Share menu at the top of your meeting screen, click the More button.
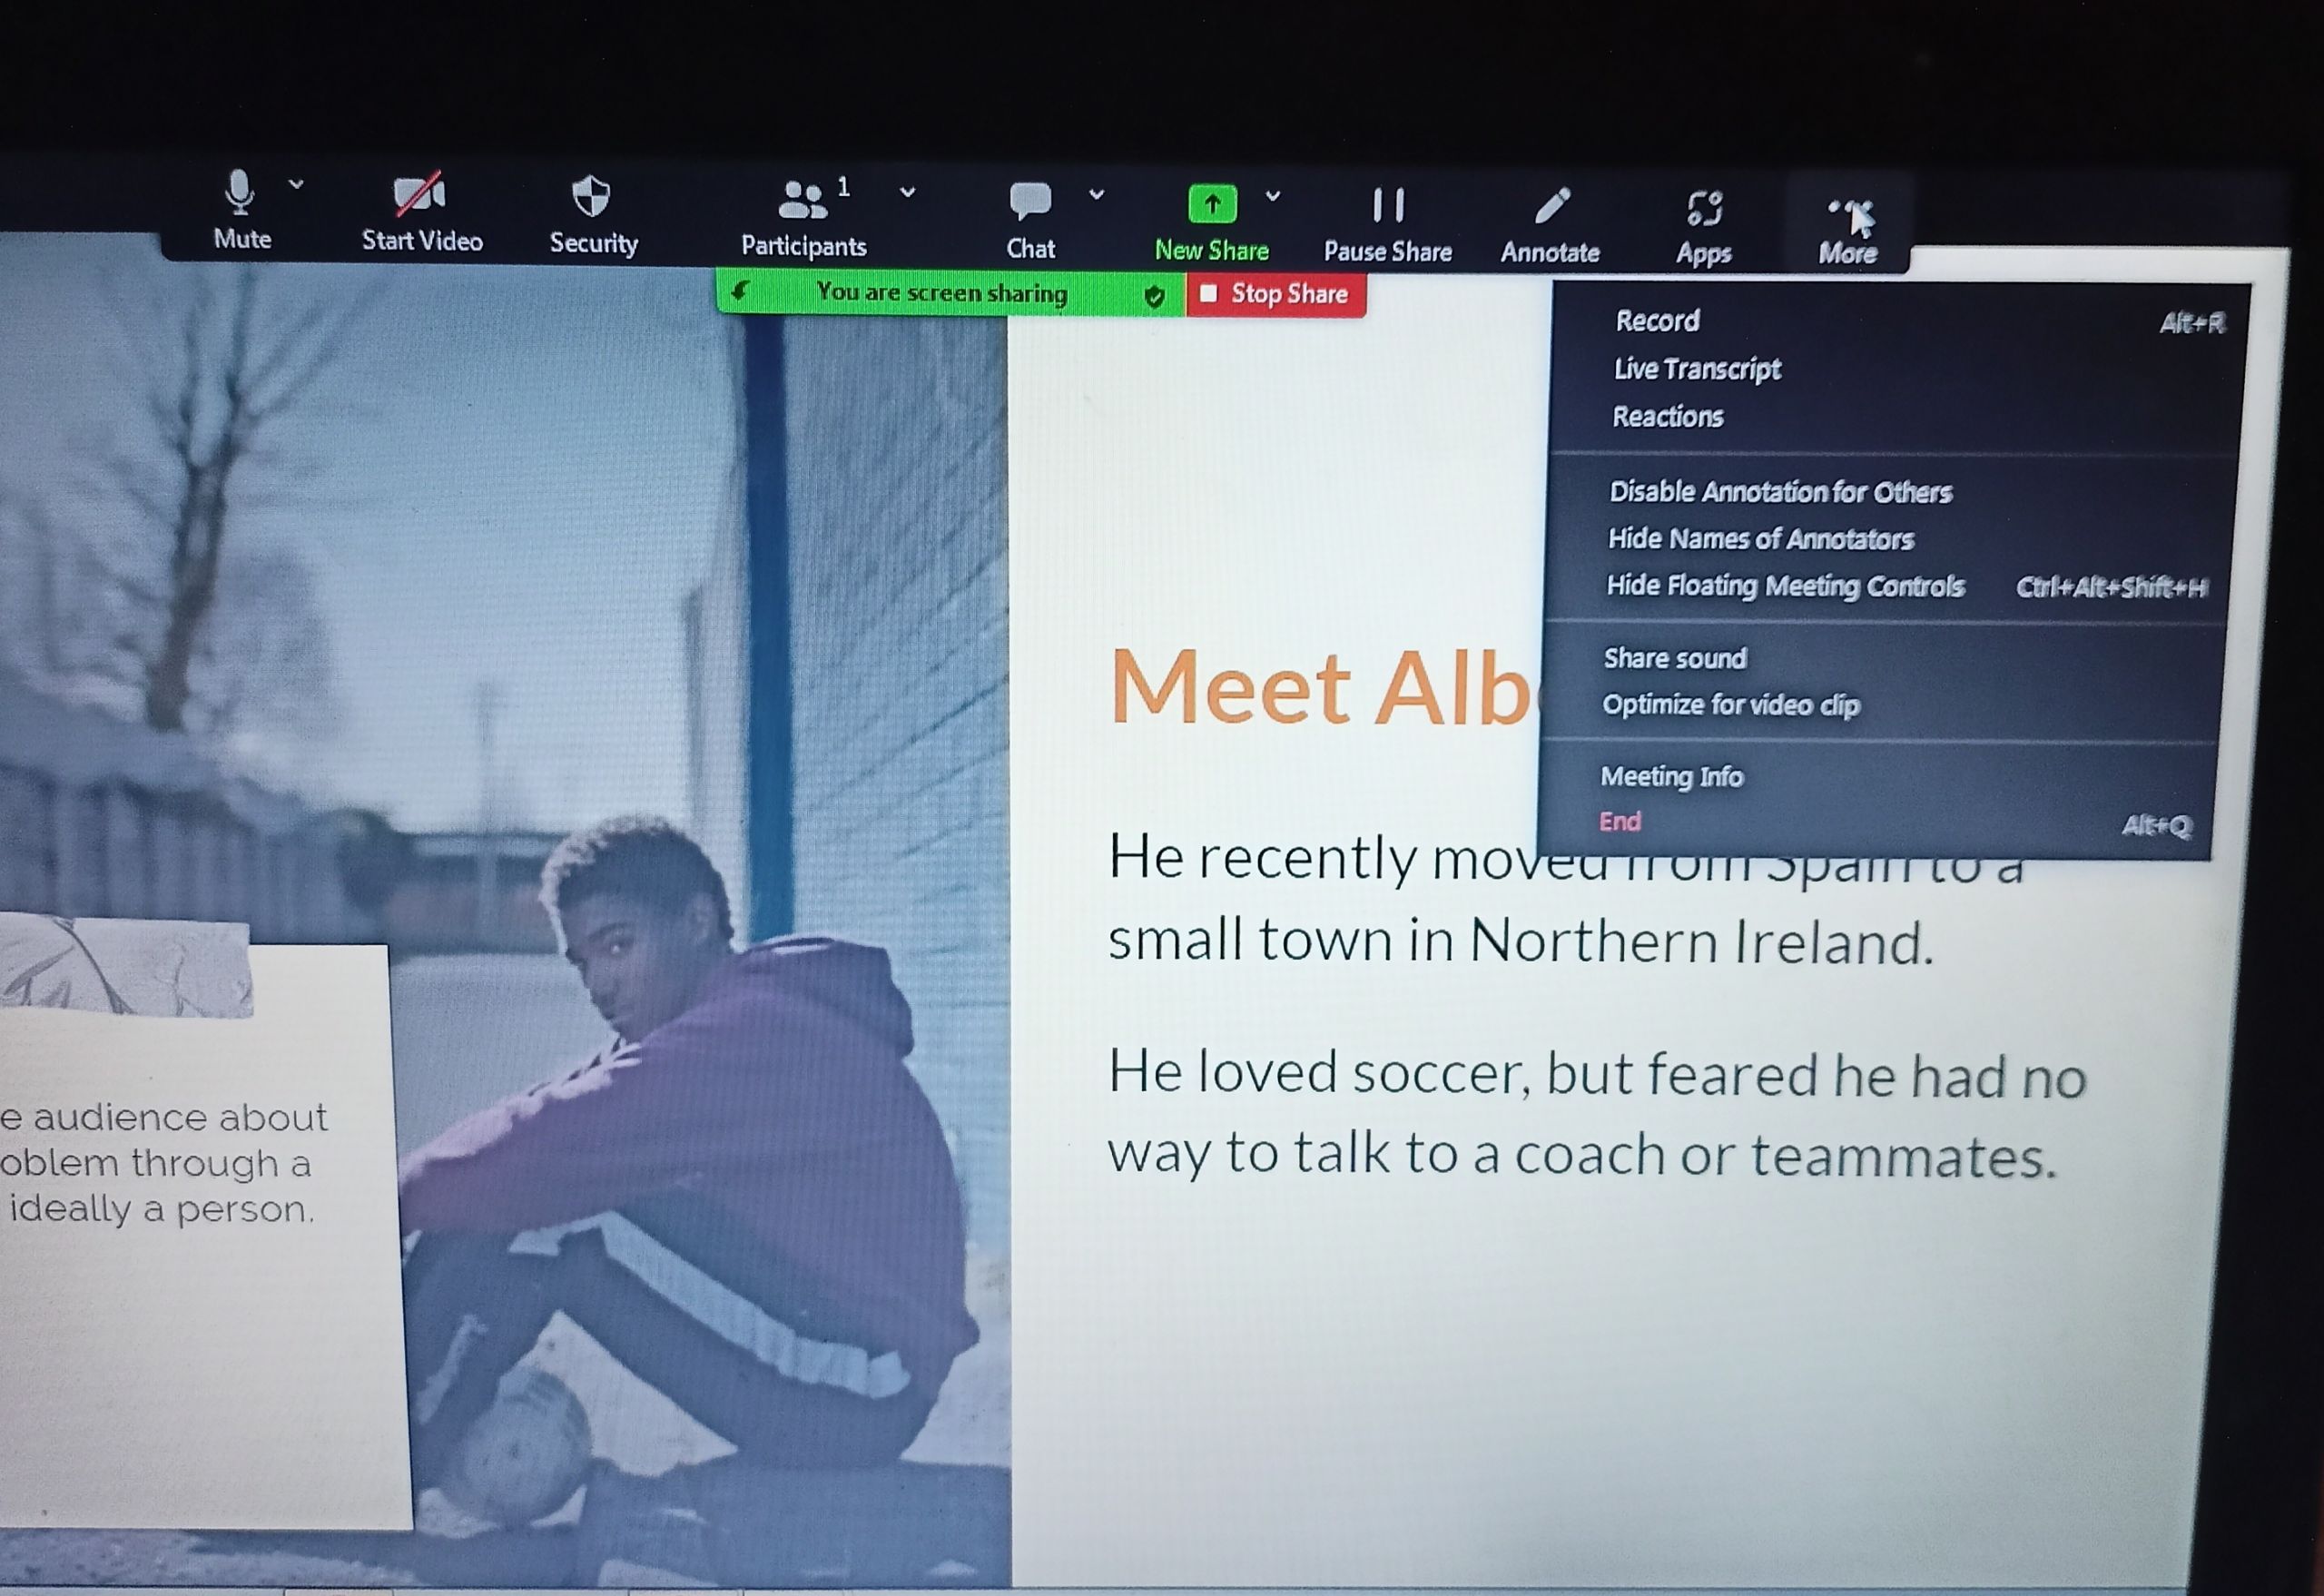
Select the Disable Annotation for Others option from the drop-down menu.
End Meeting
When the class is over, don’t forget to end the meeting by clicking End Meeting, then select End Meeting for All to end the meeting for yourself and all students.